接口自动化测试开发技能
- 测试框架:TestNG、HttpClient
- Mock技术
- 数据持久层框架:MyBatis
- 持续集成工具:Jenkins
- 接口协议相关基础知识:HTTP协议
接口测试的范围
功能测试
- 等价类划分法
- 边界值分析法
- 错误推断法
- 因果图法
- 判定表驱动法
- 正交实验法
- 功能图法
- 场景法
TestNG
mvn依赖
1
2
3
4
5
6
7
8
9
10
11
12
13
14
15
16
17
18
19
20
21
| <dependencies>
<dependency>
<groupId>org.testng</groupId>
<artifactId>testng</artifactId>
<version>7.3.0</version>
</dependency>
</dependencies>
<build>
<plugins>
<plugin>
<groupId>org.apache.maven.plugins</groupId>
<artifactId>maven-compiler-plugin</artifactId>
<version>3.8.1</version>
<configuration>
<source>11</source>
<target>11</target>
</configuration>
</plugin>
</plugins>
</build>
|
基本注解
| 注释 |
解释 |
| @Test |
一个测试方法或者测试类 |
| @BeforeMethod |
每个测试方法前需要执行的方法 |
| @AfterMethod |
每个测试方法后需要执行的方法 |
| @BeforeClass |
标注类运行前运行的方法 |
| @AfterClass |
标注类运行后运行的方法 |
| @BeforeSuite |
Suite可以包含多个class,类运行前运行 |
| @AfterSuite |
类运行后运行 |
| @Test(enabled = false) |
忽略执行 |
| @BeforeGroups(“server”) |
组测试前的测试方法 |
套件测试
1
2
3
4
5
6
7
8
9
10
11
|
package com.course.testng.suite;
import org.testng.annotations.Test;
public class LoginTest {
@Test
public void loginTaobao(){
System.out.println("淘宝登陆成功");
}
}
|
1
2
3
4
5
6
7
8
9
10
11
|
package com.course.testng.suite;
import org.testng.annotations.Test;
public class PayTest {
@Test
public void payAli(){
System.out.println("支付宝登陆成功");
}
}
|
1
2
3
4
5
6
7
8
9
10
11
12
13
14
15
16
|
package com.course.testng.suite;
import org.testng.annotations.AfterSuite;
import org.testng.annotations.BeforeSuite;
public class SuiteConfig {
@BeforeSuite
public void beforeSuite(){
System.out.println("before suite start");
}
@AfterSuite
public void afterSuite(){
System.out.println("after suite start");
}
}
|
在对应的resource 文件夹下创建suite.xml文件,并指定套件和其中的执行顺序。执行这个xml,即可执行
1
2
3
4
5
6
7
8
9
10
11
12
13
14
15
16
17
18
| <?xml version="1.0" encoding="UTF-8" ?>
<!DOCTYPE suite SYSTEM "https://testng.org/testng-1.0.dtd" >
<suite name="test">
<test name="login">
<classes>
<class name="com.course.testng.suite.SuiteConfig"/>
<class name="com.course.testng.suite.PayTest"/>
</classes>
</test>
<test name="pay">
<classes>
<class name="com.course.testng.suite.SuiteConfig"/>
<class name="com.course.testng.suite.PayTest"/>
</classes>
</test>
</suite>
|
组测试
1
2
3
4
5
6
7
8
9
10
11
12
13
14
15
16
17
18
19
20
21
22
23
24
25
26
27
28
29
30
31
32
33
34
35
36
| package com.course.testng.group;
import org.testng.annotations.AfterGroups;
import org.testng.annotations.BeforeGroups;
import org.testng.annotations.Test;
public class GrouponMethod {
@Test(groups = "server")
public void test1(){
System.out.println("这是服务端组的测试方法1");
}
@Test(groups = "server")
public void test2(){
System.out.println("这是服务端组的测试方法2");
}
@Test(groups = "client")
public void test3(){
System.out.println("这是客户端组的测试方法1");
}
@Test(groups = "client")
public void test4(){
System.out.println("这是客户端组的测试方法2");
}
@BeforeGroups("server")
public void beforeGroupOnServer(){
System.out.println("这服务端组运行前的测试方法");
}
@AfterGroups("server")
public void afterGroupOnServer(){
System.out.println("这服务端组运行后的测试方法");
}
}
|
类分组测试
只运行@Test中name为stu的测试方法
1
2
3
4
5
6
7
8
9
10
11
| <test name="pay">
<groups>
<run>
<include name = "stu"/>
</run>
</groups>
<classes>
<class name="com.course.testng.suite.SuiteConfig"/>
<class name="com.course.testng.suite.PayTest"/>
</classes>
</test>
|
异常测试
在希望得到某个异常时使用
1
2
3
4
5
6
7
8
9
10
11
12
13
14
15
16
17
18
19
| package com.course.testng.suite;
import org.testng.annotations.Test;
public class ExceptedException {
@Test(expectedExceptions = RuntimeException.class)
public void runtime(){
System.out.println("这是一个失败的异常测试");
}
@Test(expectedExceptions = RuntimeException.class)
public void runtime1(){
System.out.println("这是一个会成功的异常测试");
throw new RuntimeException();
}
}
|
依赖测试
一个方法的执行需要依赖于另一个方法成功的执行
1
2
3
4
5
6
7
8
9
10
11
12
13
14
15
16
17
| package com.course.testng;
import org.testng.annotations.Test;
public class DependTest {
@Test
public void test1(){
System.out.println("test1 run");
}
@Test(dependsOnMethods = {"test1"})
public void test2(){
System.out.println("test2 run");
}
}
|
参数化测试
xml方式
1
2
3
4
5
6
7
8
9
10
11
12
13
| package com.course.testng.parameter;
import org.testng.annotations.Parameters;
import org.testng.annotations.Test;
public class ParameterTest {
@Test
@Parameters({"name","age"})
public void paramTest1(String name, int age){
System.out.println("name = " + name + "age = " + age );
}
}
|
在resource文件下新建一个parameters.xml,并在xml中传入paramTest1所需参数,利用xml文档来运行测试
1
2
3
4
5
6
7
8
9
10
11
12
| <?xml version="1.0" encoding="UTF-8" ?>
<!DOCTYPE suite SYSTEM "https://testng.org/testng-1.0.dtd" >
<suite name="test_param">
<test name="param">
<classes>
<parameter name="name" value="zhangssan" />
<parameter name="age" value="10" />
<class name="com.course.testng.parameter.ParameterTest"/>
</classes>
</test>
</suite>
|
@DataProvidor方式
1
2
3
4
5
6
7
8
9
10
11
12
13
14
15
16
17
18
19
20
21
22
23
24
25
26
27
28
29
30
31
32
33
34
35
36
37
38
39
40
| package com.course.testng;
import org.testng.annotations.DataProvider;
import org.testng.annotations.Test;
import java.lang.reflect.Method;
public class DataProvidor {
@Test(dataProvider = "methodData")
public void test1(String name, int age){
System.out.println("test1方法 name = "+name+";age = " + age);
}
@Test(dataProvider = "methodData")
public void test2(String name, int age){
System.out.println("test2方法 name = "+name+";age = " + age);
}
@DataProvider(name = "methodData")
public Object[][] methodDataTest(Method method){
Object[][] result = null;
if(method.getName().equals("test1")){
result = new Object[][]{
{"zhangsan", 20},
{"lisi",25}
};
}else if(method.getName().equals("test2")){
result = new Object[][]{
{"wangwu", 50},
{"zhaoliu", 60}
};
};
return result;
}
}
|
多线程测试
注解实现
@Test(invocationCount = 10, threadPoolSize = 3)
xml实现
tests级别:不同的test tag下的用例可以在不同的线程下执行;相同的test tag下的用例只能在相同的线程下执行
class级别:相同的class tag下的用例在同一个线程中去执行;不同的class tag下的用例可以在不同线程中去执行
methods级别:所有用例都可以在不同的线程下去执行
thread-count:代表了最大并发线程数
xml文件配置这种方式不能指定线程池,只有方法上才可以指定线程池
1
| <suite name="thread" parallel = "tests" threads-count = "2" >
|
超时测试
1
2
3
4
5
6
7
8
9
10
11
12
13
14
15
16
17
| package com.course.testng;
import org.testng.annotations.Test;
public class TimeoutTest {
@Test(timeOut = 3000)
public void testSuccess (){
System.out.println("超时测试");
}
@Test(timeOut = 2000)
public void testFail() throws InterruptedException {
Thread.sleep(3000);
System.out.println("超时测试");
}
}
|
忽略测试
1
2
3
4
5
6
| public class IgnoreTest{
@Test(enabled = false)
public void ignore(){
System.out.println("忽略测试");
}
}
|
Mock框架
Mock框架是github上的一个开源项目,用于模拟各种HTTP请求。下载
moco-runner-0.11.0-standalone.jar
1
| https://repo1.maven.org/maven2/com/github/dreamhead/moco-runner/0.11.0/
|
Mock的启动
例如如下命令来启动
1
| java -jar ./moco-runner-0.11.0-standalone.jar http -p 8899 -c startup.json
|
startup.json如下
1
2
3
4
5
6
7
8
9
10
11
| [
{
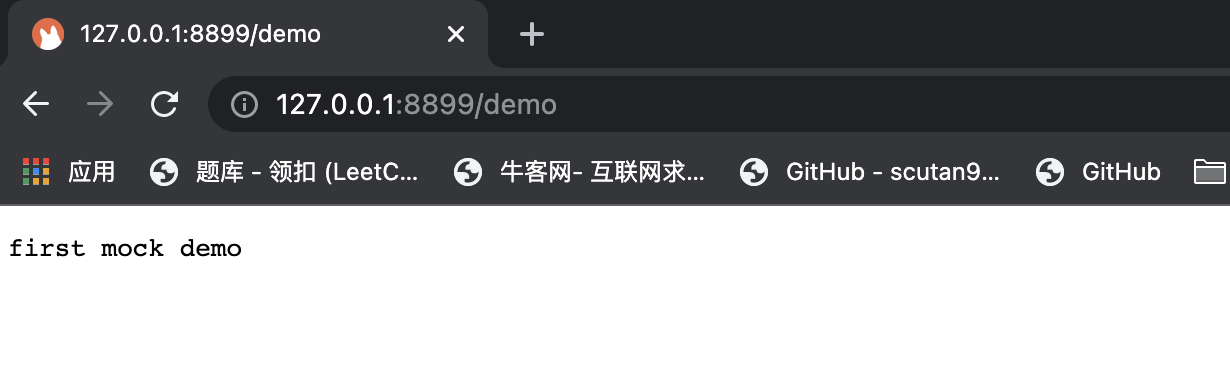
"description": "first mock sample",
"request": {
"uri": "/demo"
},
"response": {
"text": "first mock demo"
}
}
]
|
可在浏览器中打开如下网址
1
| http://127.0.0.1:8899/demo
|
![mock demo]()
在mock中配置get请求
startupget.json里面用于模拟一个get请求
1
2
3
4
5
6
7
8
9
10
11
12
| [
{
"description": "mock a get request",
"request": {
"uri": "/getdemo",
"method": "get"
},
"response": {
"text": "这是一个没有参数的get请求"
}
}
]
|
1
| java -jar ./moco-runner-0.11.0-standalone.jar http -p 8899 -c startupget.json
|
1
| http://127.0.0.1:8899/getdemo
|
1
2
3
4
5
6
7
8
9
10
11
12
13
14
15
16
| [
{
"description": "mock a get request",
"request": {
"uri": "/getwithparam",
"method": "get",
"queries": {
"name": "hi",
"age": "18"
}
},
"response": {
"text": "这是一个带参数的get请求"
}
}
]
|
请求
1
| http://127.0.0.1:8899/getwithparam?name=hi&age=18
|
在mock中配置post请求
1
2
3
4
5
6
7
8
9
10
11
12
| [
{
"description": "mock a post request",
"request": {
"uri": "/getdemo",
"method": "post"
},
"response": {
"text": "这是一个没有参数的post请求"
}
}
]
|
因为浏览器中只能输入get请求,所以我们用insomina或者postman来模拟post请求
- 启动服务
1
| java -jar ./moco-runner-0.11.0-standalone.jar http -p 8899 -c startuppost.json
|
- insomina发出post请求
![insomina mock post]()
1
2
3
4
5
6
7
8
9
10
11
12
13
14
15
16
| [
{
"description": "mock a post request",
"request": {
"uri": "/getdemo",
"method": "post",
"forms": {
"name": "hi",
"age": "18"
}
},
"response": {
"text": "这是一个带参数的post请求"
}
}
]
|
带cookies信息的get请求
1
2
3
4
5
6
7
8
9
10
11
12
13
14
15
| [
{
"description": "mock a get request with cookies",
"request": {
"uri": "/get/with/cookies",
"method": "get",
"cookies":{
"login":"true"
}
},
"response": {
"text": "这是一个带cookies的get请求"
}
}
]
|
带cookies、body信息的post请求
其中json内的信息需要加到body里
1
2
3
4
5
6
7
8
9
10
11
12
13
14
15
16
17
18
19
20
21
22
23
| [
{
"description": "mock a post request with cookies",
"request": {
"uri": "/post/with/cookies",
"method": "post",
"cookies":{
"login":"true"
},
"json": {
"name": "grace",
"age": "18"
}
},
"response": {
"status": 200,
"json": {
"isSuccess": "success",
"status": 1
}
}
}
]
|
1
2
3
4
5
6
7
8
9
10
11
12
13
14
15
16
17
18
19
20
21
22
| [
{
"description": "mock a post request with headers",
"request": {
"uri": "/post/with/headers",
"method": "post",
"headers":{
"content-type":"application/json"
},
"json":{
"name": "grace",
"gender": "woman"
}
},
"response": {
"json": {
"isSuccess": "success",
"status": "1"
}
}
}
]
|
实现请求重定向
1
2
3
4
5
6
7
8
9
10
11
12
13
14
15
16
17
18
19
20
21
22
23
24
25
| [
{
"description": "mock a redirect request",
"request": {
"uri": "/redirect",
"redirectTo": "http://www.baidu.com"
}
},
{
"description": "重定向的请求",
"request": {
"uri": "/redirect/toPath",
"redirectTo": "/redirect/new"
}
},
{
"description": "被重定向的请求",
"request": {
"uri": "/redirect/new",
},
"response":{
"test": "重定向成功"
}
}
]
|
HTTP协议接口
常用请求头
Accept:浏览器告诉服务器它所支持的数据类型
Accept-Charset:浏览器告诉服务器它采用的字符集
Accept-Encoding:浏览器告诉服务器它所支持的压缩格式
Accept-Language:浏览器告诉服务器它所支持的语言
Host:浏览器告诉服务器它想访问的主机
If-Modified-Since:浏览器告诉服务器它缓存数据的时间
Referer:浏览器告诉服务器是从哪个网页而来(防盗链)
User-Agent:浏览器告诉服务器所使用的浏览器类型、版本等信息
Date:浏览器告诉服务器访问时间
常用响应头
Location:服务器告知浏览器你去找谁,配合302状态码使用
Server:浏览器的类型
Content-Encoding:数据的压缩格式
Content-Type:回送数据的地址
Last-Modified:数据的最后修改时间
Refresh:控制浏览器定时刷新
Content-Disposition:需要以下载方式打开回送的数据
Transfer-Encoding:浏览器数据是以分块形式回送的
Cookie与Session
- cookie存储在客户端的头信息中
- session在服务端存储,文件、数据库都可以
- session的验证需要cookie带一个字段来表示这个用户是哪个session,当客户端禁用cookie时,session将失效
- cookie的格式为key:value; key:value
- cookie的值由服务端生成,客户端保存